GNS3
GNS3 is an open-source, free software platform that allows users to virtualize hardware devices. GNS3 (Graphical Network Simulator) enables the simulation of complex networks using virtual devices. It is widely used by network professionals and students for training and certification preparation.
GNS3 - Install you GNS3 Server
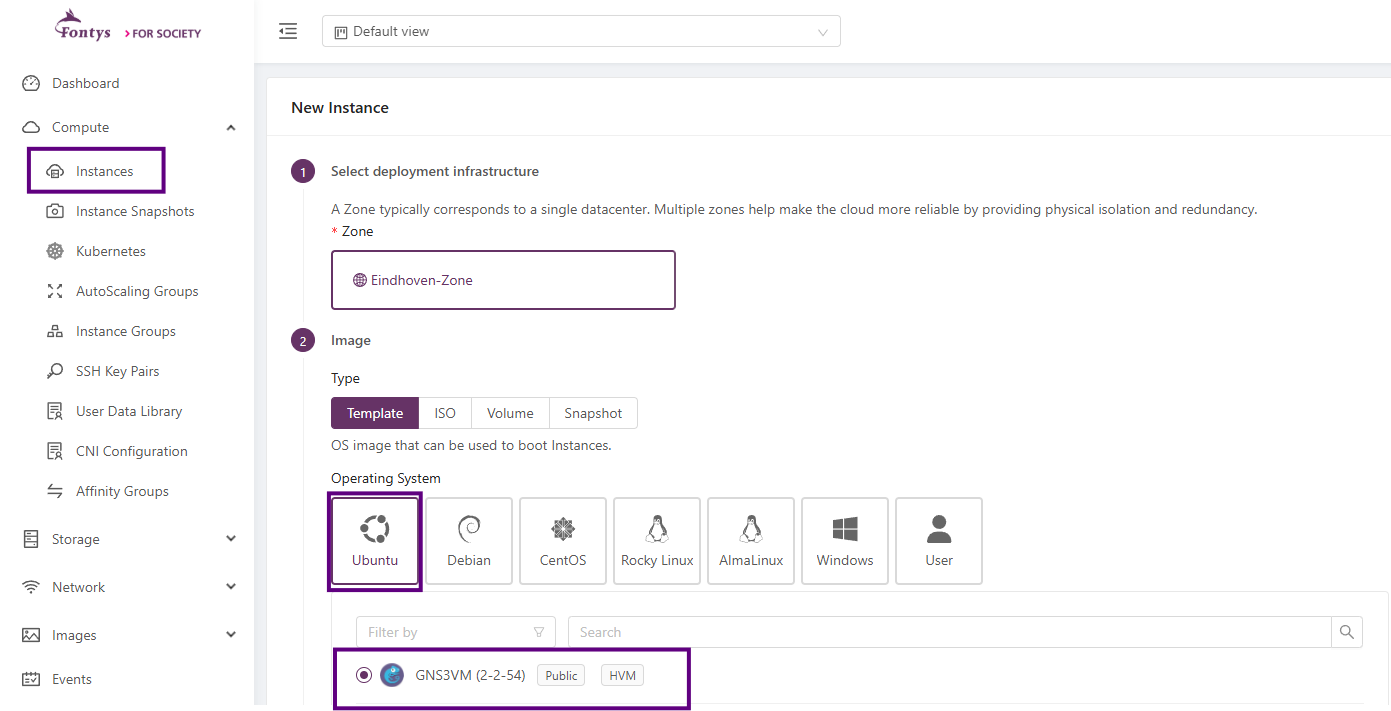
From the left navigation menu, select "compute" → "Instances" and click on "Add Instance"
Since the GNS3 image is based on Ubuntu, choose Ubuntu under the Operating System filter.
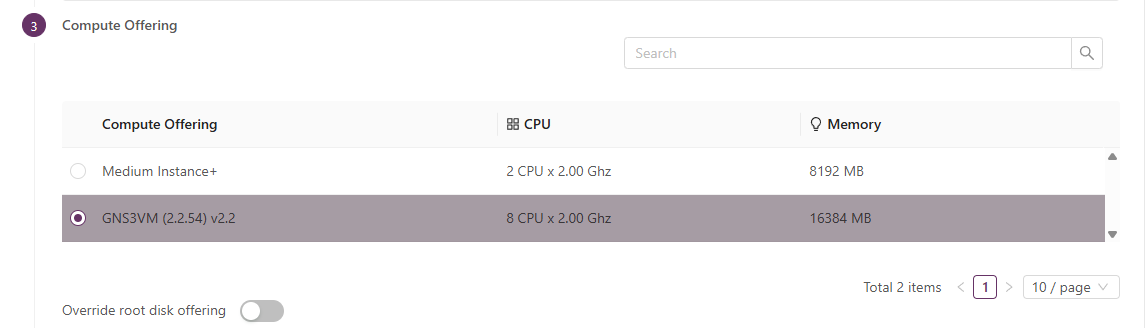
Compute Offering
Under the Compute Offering option, select GNS3VM (2.2.59) Offering for GNS3 Image. You can always scale the offering up or down as needed; please refer to the documentation for instructions on how to adjust your instance.
Data Disk
Leave the DATA disk unselected by choosing No thanks. This option adds an additional separate disk to your instance. If more space is needed you can always upscale the root disk later; please refer to the documentation for instructions on how to do this.
Networks
Choose the Network on which the server will be deployed.
Shared Network
When selecting the shared network DHCP-Sx-Internet-Only, your GNS3 instance will have access to the internet.
This network is shared with other users and provides only a basic outgoing internet connection.
When selecting this shared network, you will not have any default virtual router deployed, so it is not possible to create any incoming firewall rules on this network.
You can access your GNS3 instance by using a OpenVPN Connection. See the documentation on how to install the OpenVPN client on your Client PC.
OpenVPN Installation
If you require incoming firewall rules for example, because you have an external IP address assigned—then you need to create an isolated network.
The Shared network DHCP-Sx-Internet-Only is default selected.
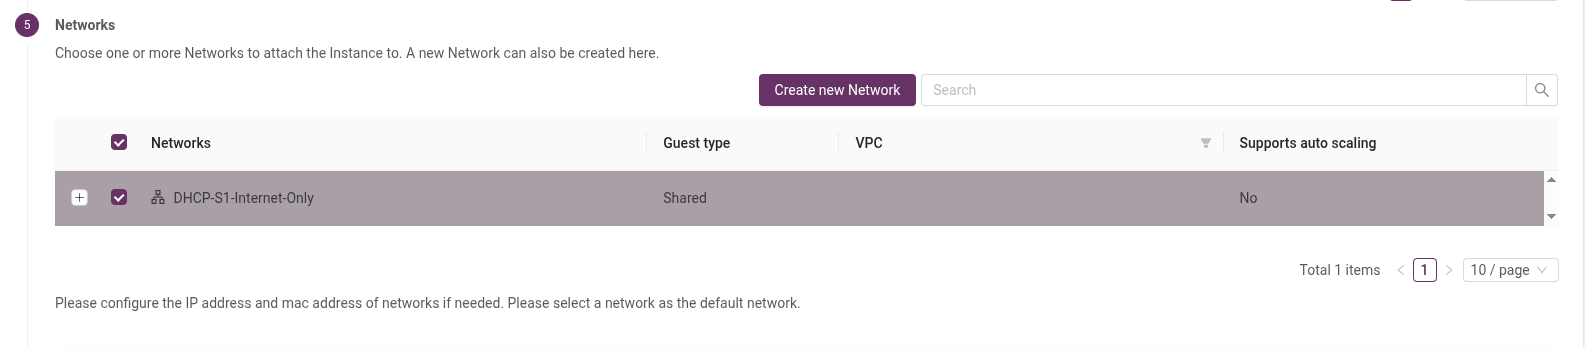
Isolated Network
If you want to create a isolated, select Create New Network.
Enter the required information as shown in the screenshot.
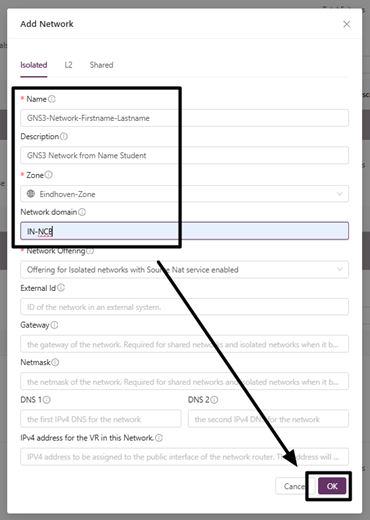
When the isolated network has been created, deselect the shared network.

Backup
Optional: add the GNS3 instance to the backup.

You can start the backup manually from the menu or add it to a backup schedule.
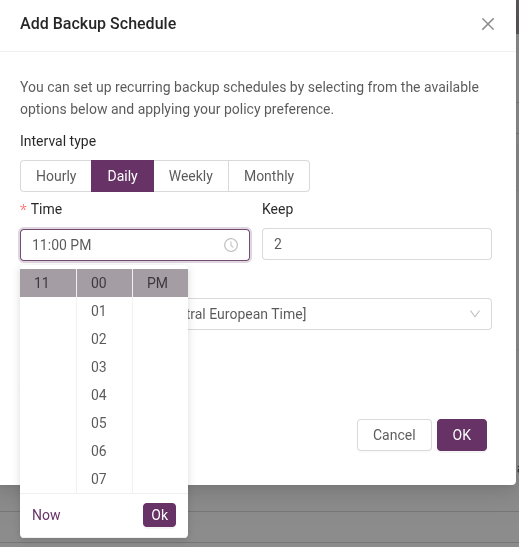
You can always add the instance to the backup. See the documentation on how to backup and restore.
Backup and Restore
Note: Because of limited capacity, currently only 600 GB of backup space is available.
GNS3 Instance Name
After filling in the information, enter a Name for your GNS3 instance.
Use your first and last name to identify your server.
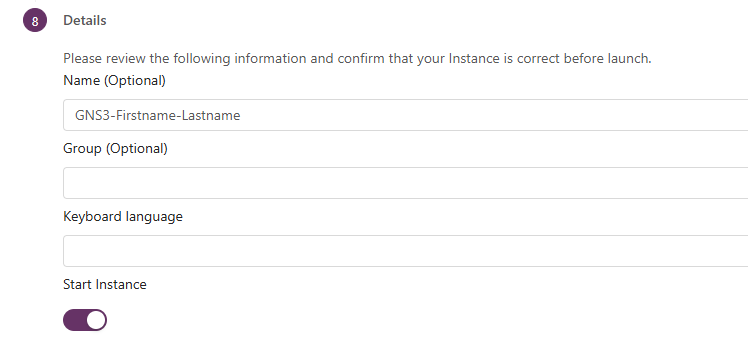
Click "Launch Instance"
GNS3 Firewall
This section is only needed with an isolated network.
Open Required Ports
To open the required ports, go to Public IP Addresses and click on the IP address of your GNS3 appliance.
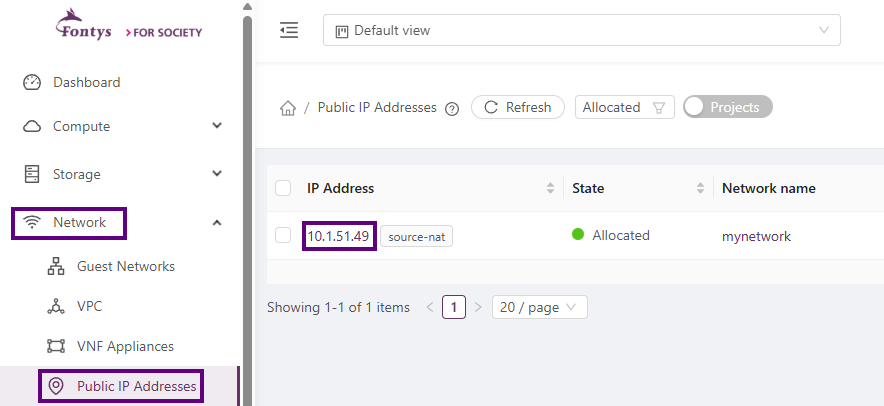
To allow SSH access, GNS3 web access, GNS3 client access, and VNC client access, the following ports must be allowed in the firewall:
- 22 for SSH
- 80 for the GNS3 web interface and client
- 5000–6000 for connecting the VNC client to the VMs in GNS3
- 8080 Management
Add the ports to the firewal:
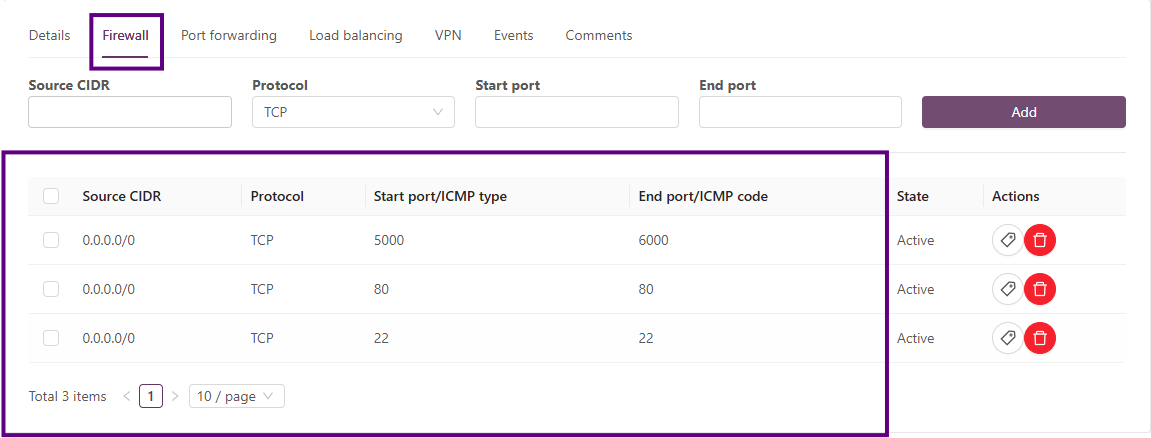
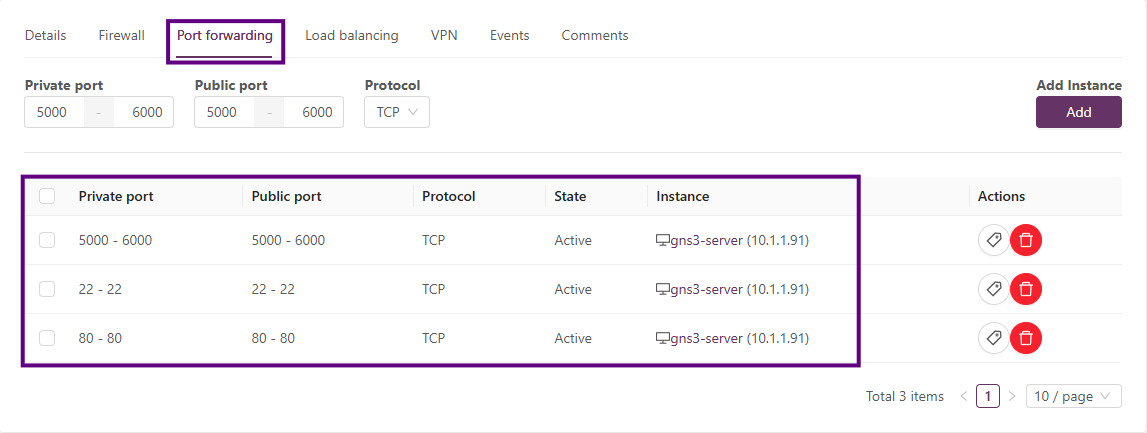
The same ports also need to be forwarded to the GNS3 instance.
- Select the Port Forwarding tab.
- Add the required ports and assign them to the GNS3 instance by clicking the Add button.
GNS3 Client
To ensure proper communication and functionality, the GNS3 client version *need to match the server version. Follow the link below to download the correct GNS3 vesion.
- From the navigation menu, select Downloads or click Downloads Page
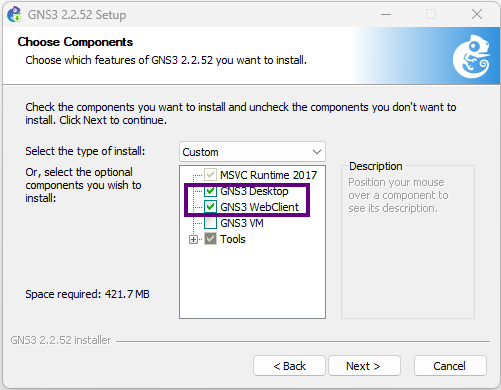
Enable both the Desktop and the Webclient option.
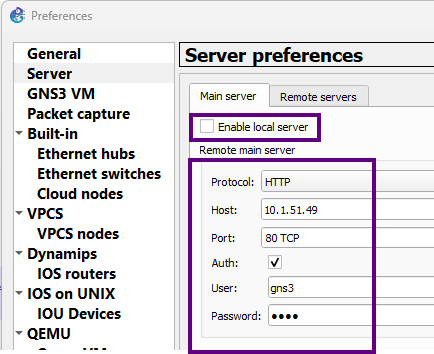
After installing the GNS3 client, configure it to connect to the IP address of your firewall. In the GNS3 client, open Preferences from the Edit menu, or use the shortcut Ctrl + Shift + P.
GNS3 Template Credentials
Default Credentials for GNS3 Appliance Templates